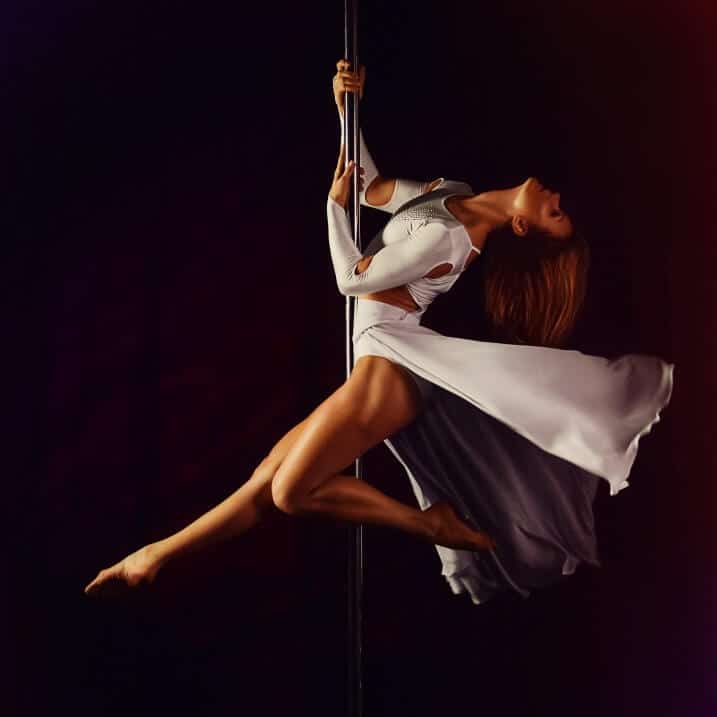

Discover the unique blend of pole dancing and yoga with our introductory Polga routine. This routine is designed to improve core strength, enhance flexibility, and bring a sense of balance and mindfulness to your fitness journey. Whether you’re a seasoned pole dancer or new to the world of yoga, this routine offers a fresh perspective on holistic fitness.
Equipment Needed:
- A pole for pole dancing
- A yoga mat
- Comfortable clothing allowing for a full range of motion
Warm-Up:

- Surya Namaskar (Sun Salutation): A traditional yoga sequence to warm up the body. Perform 3-5 rounds at a gentle pace.
- Basic Pole Walks: Circle the pole, holding it with one hand, to get accustomed to the pole and warm up your legs and arms.
Polga Routine:
-
-
Adho Mukha Svanasana (Downward-Facing Dog):
Start with this pose to stretch the spine and hamstrings, holding for 30 seconds.

Adho Mukha Svanasana Position and Movement:
- Start on Hands and Knees: Begin in a tabletop position on your yoga mat. Your wrists should be under your shoulders, and your knees under your hips.
- Lift Hips Up and Back: Exhale and lift your hips upwards, straightening your legs and arms to form an inverted V-shape with your body.
- Adjust Position: Your hands should be shoulder-width apart, fingers spread wide. Your feet are hip-width apart with toes pointing forward. Press your hands into the mat.
- Refine the Pose: Aim to bring your heels down towards the mat, though they don’t need to touch the ground. Lengthen your spine and tailbone, keeping your head between your arms, gaze towards your feet.
- Engage Muscles: Engage your thigh muscles, rotating them slightly inward. Draw your shoulder blades into your upper back ribs and towards your tailbone. Keep the head relaxed and in line with your upper arms.
Duration:
- Hold the pose for 1-3 minutes, depending on your comfort level.
Benefits:
- Strengthens the arms and legs.
- Stretches the shoulders, hamstrings, calves, arches, and hands.
- Energizes the body.
- Helps relieve stress and mild depression.
- Improves digestion.
- Eases symptoms of menopause.
- Relieves headache, insomnia, back pain, and fatigue.
- Therapeutic for high blood pressure, asthma, flat feet, sciatica, sinusitis.
Modifications and Cautions:
- If you have carpal tunnel syndrome, be cautious in this pose.
- For beginners, bending the knees slightly can help maintain the length in the spine.
- If you have stiff legs, use a block under your hands for support.
- Avoid this pose if you are in late-term pregnancy.
Breathing:
- Maintain steady, even breaths through the nostrils while in the pose.
Exiting the Pose:
- To exit, exhale and gently bend your knees, coming back into a tabletop position or seated on your heels.
Incorporating this asana into your routine can significantly improve your strength and flexibility, key components in practices like Polga. Remember, it’s important to listen to your body and make adjustments as necessary.
-
Pole Squats:
Stand facing away from the pole, reach back and hold the pole at waist height, perform 10-15 squats for leg strength.Position and Movement:
- Stand Near the Pole: Begin by standing close to the pole, facing away from it. Your feet should be shoulder-width apart.
- Grip the Pole: Reach back with both hands and grip the pole at about waist height. Your grip should be firm but comfortable.
- Lower into a Squat: Bend your knees and lower your body into a squat position. Aim to get your thighs parallel to the floor, like sitting back into a chair. Keep your back straight and chest lifted.
- Engage with the Pole: As you squat, use the pole for slight support and stability. Ensure your weight is primarily on your heels and not leaning too far back on the pole.
- Return to Standing: Push through your heels to return to a standing position, squeezing your glutes at the top of the movement.
Repetitions:
- Perform 10-15 squats in a set. You can do multiple sets depending on your fitness level.
Benefits:
- Strengthens the thighs, glutes, hips, and lower back.
- Engages the core and improves balance.
- The use of the pole increases upper body engagement, particularly in the arms and shoulders.
- Enhances coordination and body awareness.
Modifications and Cautions:
- If you’re a beginner, you might want to start with fewer repetitions and gradually increase as you build strength.
- For more intensity, you can squat deeper or add a small jump as you come up from the squat.
- Ensure the pole is securely installed to bear your weight during the exercise.
- Avoid this exercise if you have knee or lower back issues.
Breathing:
- Inhale as you lower down into the squat, and exhale as you push back up to standing.
Exiting the Exercise:
- To finish, gently release your grip from the pole and stand upright, taking a moment to steady yourself if needed.
-
Virabhadrasana II (Warrior II):
A powerful stance that builds lower body strength and balance. Hold for 30 seconds on each side.Position and Movement:
- Starting Position: Begin standing on your yoga mat. Step or lightly jump your feet 3 to 4 feet apart. Raise your arms parallel to the floor and reach them actively out to the sides, palms down.
- Foot Alignment: Turn your right foot slightly to the right and your left foot out to the left 90 degrees. Align the left heel with the right heel.
- Lower into the Pose: Bend your left knee over the left ankle, so that the shin is perpendicular to the floor. If possible, bring the left thigh parallel to the floor.
- Upper Body Alignment: Keep your torso perpendicular to the floor, with the sides of the torso equally long. Stretch your arms away from the space between the shoulder blades.
- Gaze and Neck Position: Turn your head to the left and look out over your left hand. Keep the sides of the neck long and the crown of the head lifting.
Duration:
- Hold the pose for 30 seconds to 1 minute. Repeat for the same length of time on the other side.
Benefits:
- Strengthens and stretches the legs and ankles.
- Stretches the groins, chest, lungs, and shoulders.
- Increases stamina.
- Stimulates abdominal organs and digestion.
- Helps relieve backaches, especially through the second trimester of pregnancy.
- Therapeutic for carpal tunnel syndrome, flat feet, infertility, osteoporosis, and sciatica.
Modifications and Cautions:
- If you find it difficult to keep the back heel grounded, you can lift the heel slightly or use a folded mat under the heel for support.
- For neck problems, don’t turn the head to look over the front hand; instead, look straight ahead with both sides of the neck lengthened evenly.
- Avoid this pose if you have high blood pressure or diarrhea.
Breathing:
- Breathe deeply and evenly while holding the pose, maintaining a smooth and rhythmic pattern.
Exiting the Pose:
- To come out of the pose, inhale as you straighten the left leg. Lower your arms and turn your feet to face forward. Repeat on the other side.
-
Pole Lunges: Holding the pole for balance, perform lunges to strengthen the thighs and glutes. 10 lunges on each leg.
-
Dandasana (Staff Pose):
Sit with your legs stretched in front of you, hands on the mat, and spine straight. Hold for 1 minute to build core strength.Position and Movement:
- Starting Position: Begin standing on your yoga mat. Step or lightly jump your feet 3 to 4 feet apart. Raise your arms parallel to the floor and reach them actively out to the sides, palms down.
- Foot Alignment: Turn your right foot slightly to the right and your left foot out to the left 90 degrees. Align the left heel with the right heel.
- Lower into the Pose: Bend your left knee over the left ankle, so that the shin is perpendicular to the floor. If possible, bring the left thigh parallel to the floor.
- Upper Body Alignment: Keep your torso perpendicular to the floor, with the sides of the torso equally long. Stretch your arms away from the space between the shoulder blades.
- Gaze and Neck Position: Turn your head to the left and look out over your left hand. Keep the sides of the neck long and the crown of the head lifting.
Duration:
- Hold the pose for 30 seconds to 1 minute. Repeat for the same length of time on the other side.
Benefits:
- Strengthens and stretches the legs and ankles.
- Stretches the groins, chest, lungs, and shoulders.
- Increases stamina.
- Stimulates abdominal organs and digestion.
- Helps relieve backaches, especially through the second trimester of pregnancy.
- Therapeutic for carpal tunnel syndrome, flat feet, infertility, osteoporosis, and sciatica.
Modifications and Cautions:
- If you find it difficult to keep the back heel grounded, you can lift the heel slightly or use a folded mat under the heel for support.
- For neck problems, don’t turn the head to look over the front hand; instead, look straight ahead with both sides of the neck lengthened evenly.
- Avoid this pose if you have high blood pressure or diarrhea.
Breathing:
- Breathe deeply and evenly while holding the pose, maintaining a smooth and rhythmic pattern.
Exiting the Pose:
- To come out of the pose, inhale as you straighten the left leg. Lower your arms and turn your feet to face forward. Repeat on the other side.
- Pole Seat: Sit on the pole using your arms and core for support, hold for 30 seconds to build upper body and core strength.
-
Cool Down:
- Balasana (Child’s Pose): A resting pose to relax the body and mind, hold for 1 minute.
- Pole Stretch: Use the pole to stretch out your arms and back, holding each stretch for 30 seconds.
Conclusion: Incorporating these yoga poses and pole exercises into your routine offers a balanced approach to fitness. The combination of strength, flexibility, and control in Polga not only enhances your physical wellbeing but also promotes mental clarity and mindfulness. Practice this routine regularly to experience the full benefits of this unique fusion of disciplines.
Reminder: Always listen to your body and modify poses as needed. Ensure safety while using the pole, especially for beginners.